

Add & Import Contacts
Emalc offers two flexible methods to populate your audience directory: manual single-contact addition for quick individual updates, and a high-speed bulk CSV import engine capable of importing up to 20 MB of subscriber records in the background.
Method 1: Adding a Single Contact Manually#
Use this method when you need to add an individual customer, VIP client, or test subscriber directly from your dashboard.
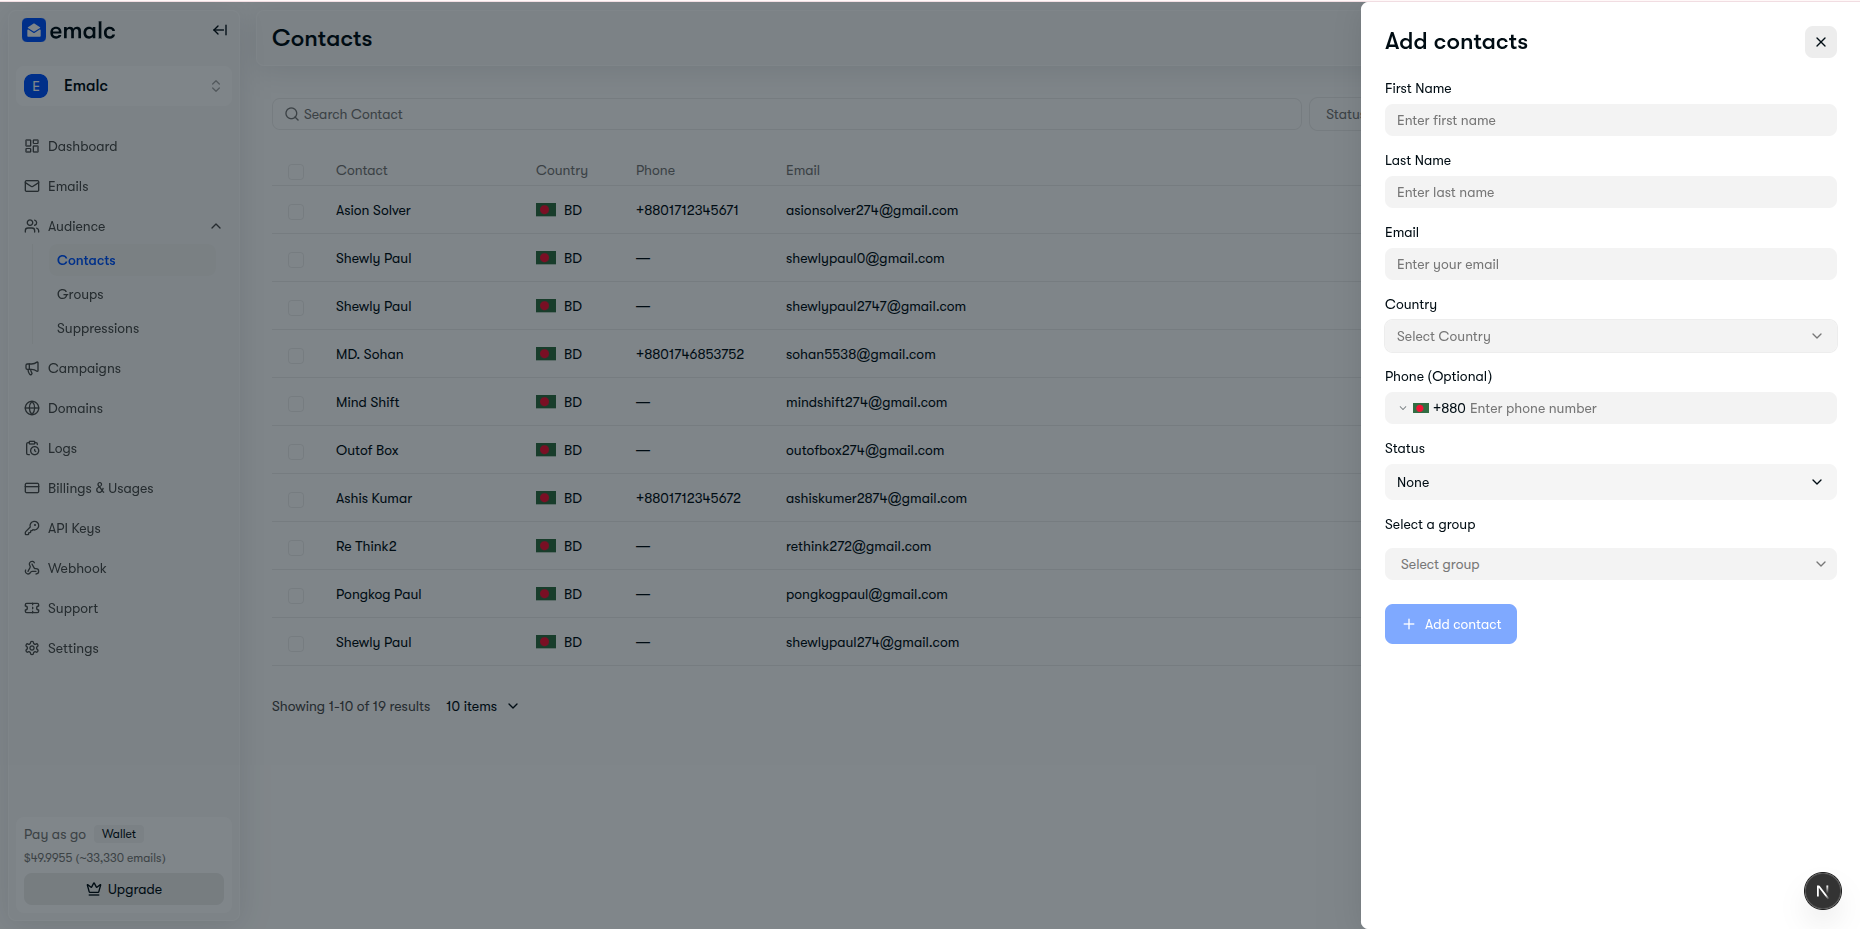 Manual Add Contacts slide-over panel with name, email, country, and status fields
Step-by-Step Instructions:#
- Navigate to Audience → Contacts in your dashboard.
- Click the blue + Add contact button in the top-right toolbar.
- In the right slide-over panel, fill in the subscriber details:
- First Name & Last Name: Personal names used for
{{first_name}}and{{last_name}}merge tags. - Email: The subscriber's email address (required).
- Country: Select the subscriber's country from the searchable dropdown.
- Phone (Optional): Enter their phone number with the corresponding country flag and dial code.
- Status: Select their subscription state (
Subscribed,Unsubscribed, orNone). - Select a group: Assign the contact to one or more existing groups, or click to create a new group directly from the dropdown.
- First Name & Last Name: Personal names used for
- Click + Add contact to save.
Automatic Group Synchronization
When you set a contact's status to Subscribed, Emalc automatically links them to your default Email Subscribed group. If you later mark them as Unsubscribed, the system automatically removes them from subscribed lists and safely updates their preference.
Method 2: Bulk CSV Import#
When migrating from another email service provider or importing an existing customer database, use the bulk CSV import tool.
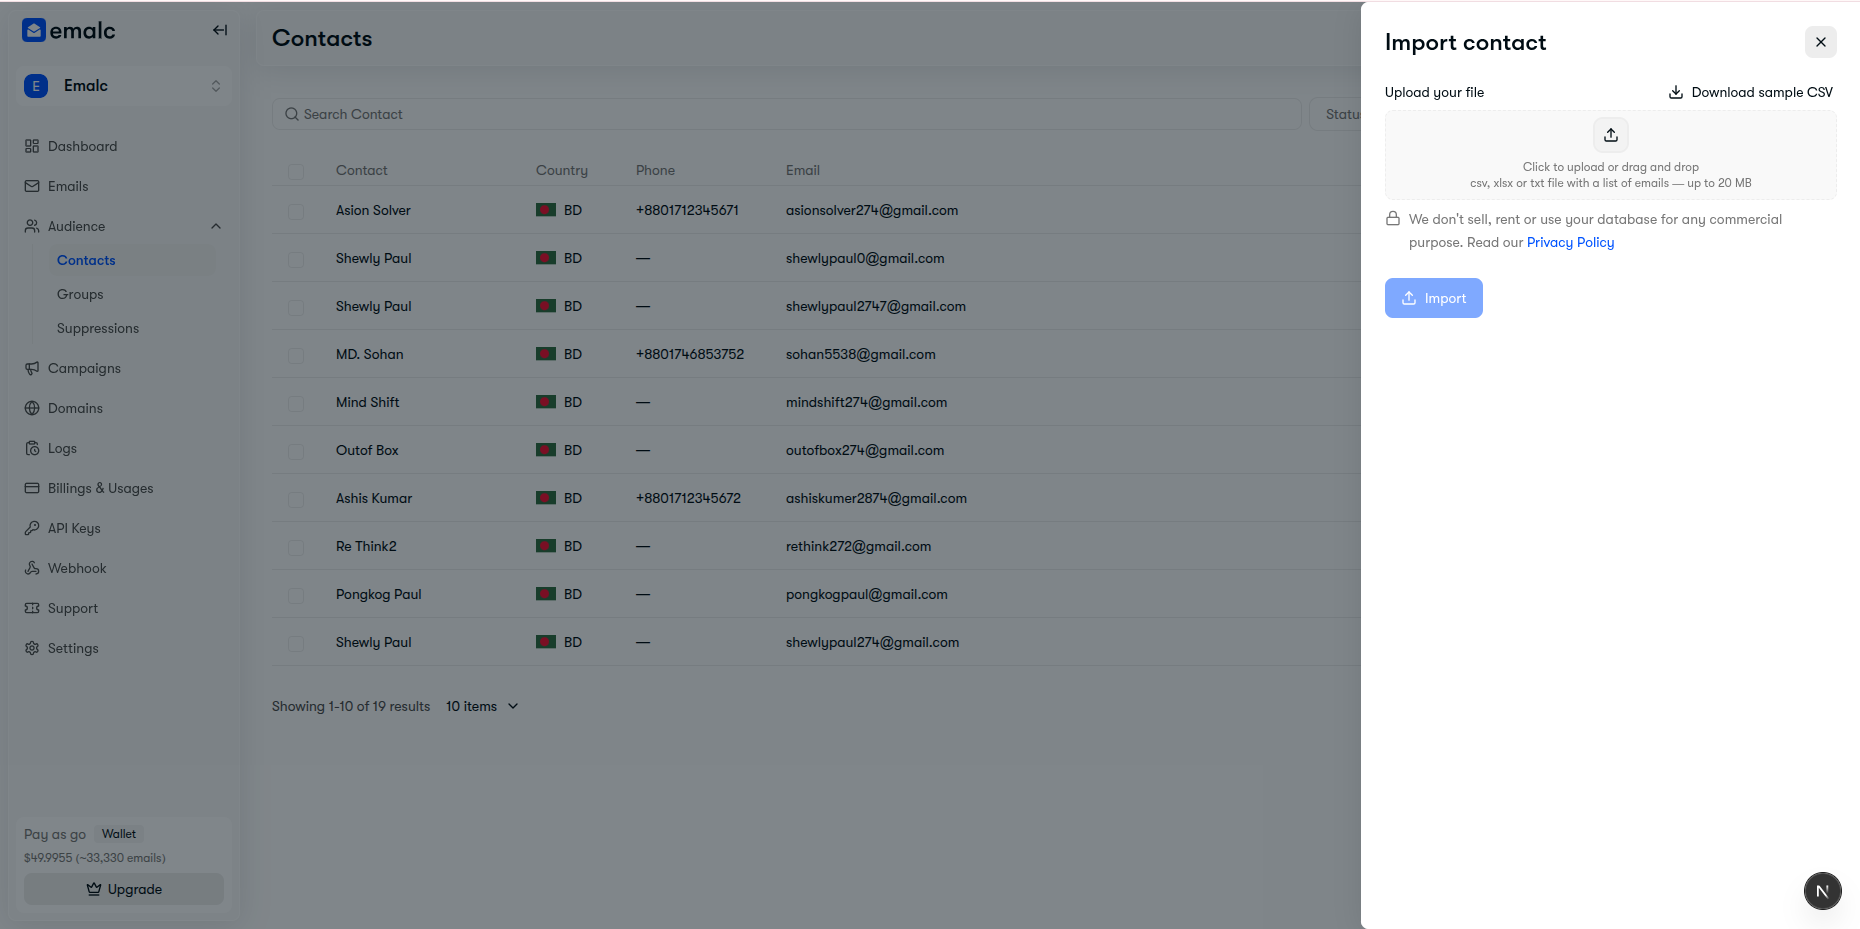 CSV Import drawer with drag-and-drop file uploader and sample CSV download button
Step 1: Prepare Your CSV File#
Before uploading, ensure your CSV file matches our recommended format. You can click Download sample CSV directly inside the import modal to obtain the official template (contacts_model.csv).
| Column Header | Required | Example | Notes |
|---|---|---|---|
emailaddress | Yes | john.smith@example.com | Must be a valid, syntactically correct email. |
firstName | No | John | Used for email personalization. |
lastName | No | Smith | Used for email personalization. |
displayName | No | John Smith | Optional full display name. |
country | No | US / CA / GB / BD | 2-letter ISO country code. |
phonenumber | No | +1234567890 | International format with + country code. |
status | No | subscribed | Can be subscribed or unsubscribed. |
Step 2: Upload Your File#
- In Audience → Contacts, click the Import contacts button.
- Drag and drop your
.csv,.xlsx, or.xlsfile into the upload zone, or click to browse files from your computer (maximum file size: 20 MB).
Step 3: Pre-Flight Inspection & Group Assignment#
Once uploaded, Emalc's client-side and server-side parsers immediately validate your records and display a pre-flight breakdown:
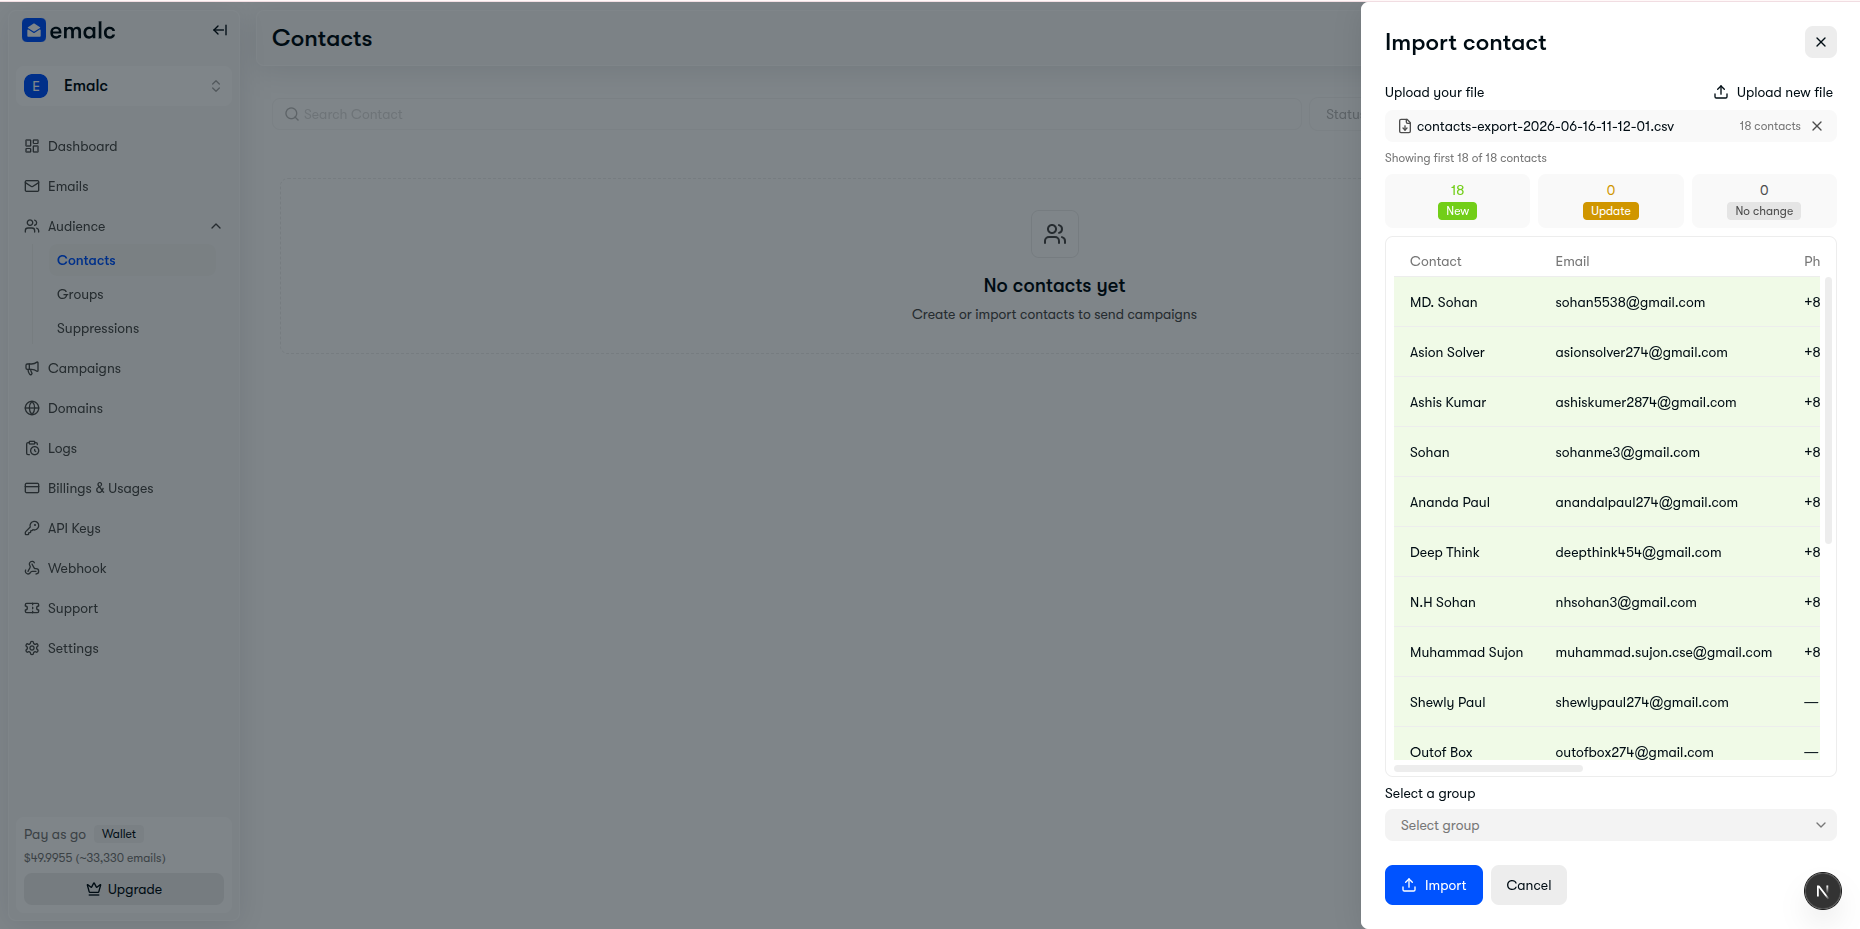 CSV import pre-flight summary showing valid rows, update counts, and group assignment
- New: Brand new email addresses that will be added to your workspace.
- Update: Existing contacts whose name, phone, or country fields will be updated with the new data.
- No change: Records that are already up-to-date in your database.
- Assign to Group: Select any group from the Select a group dropdown to automatically assign all imported contacts to that list upon completion.
Step 4: Confirm & Background Import#
Click the blue Import button. Emalc streams the data in background chunks so your browser remains completely responsive:
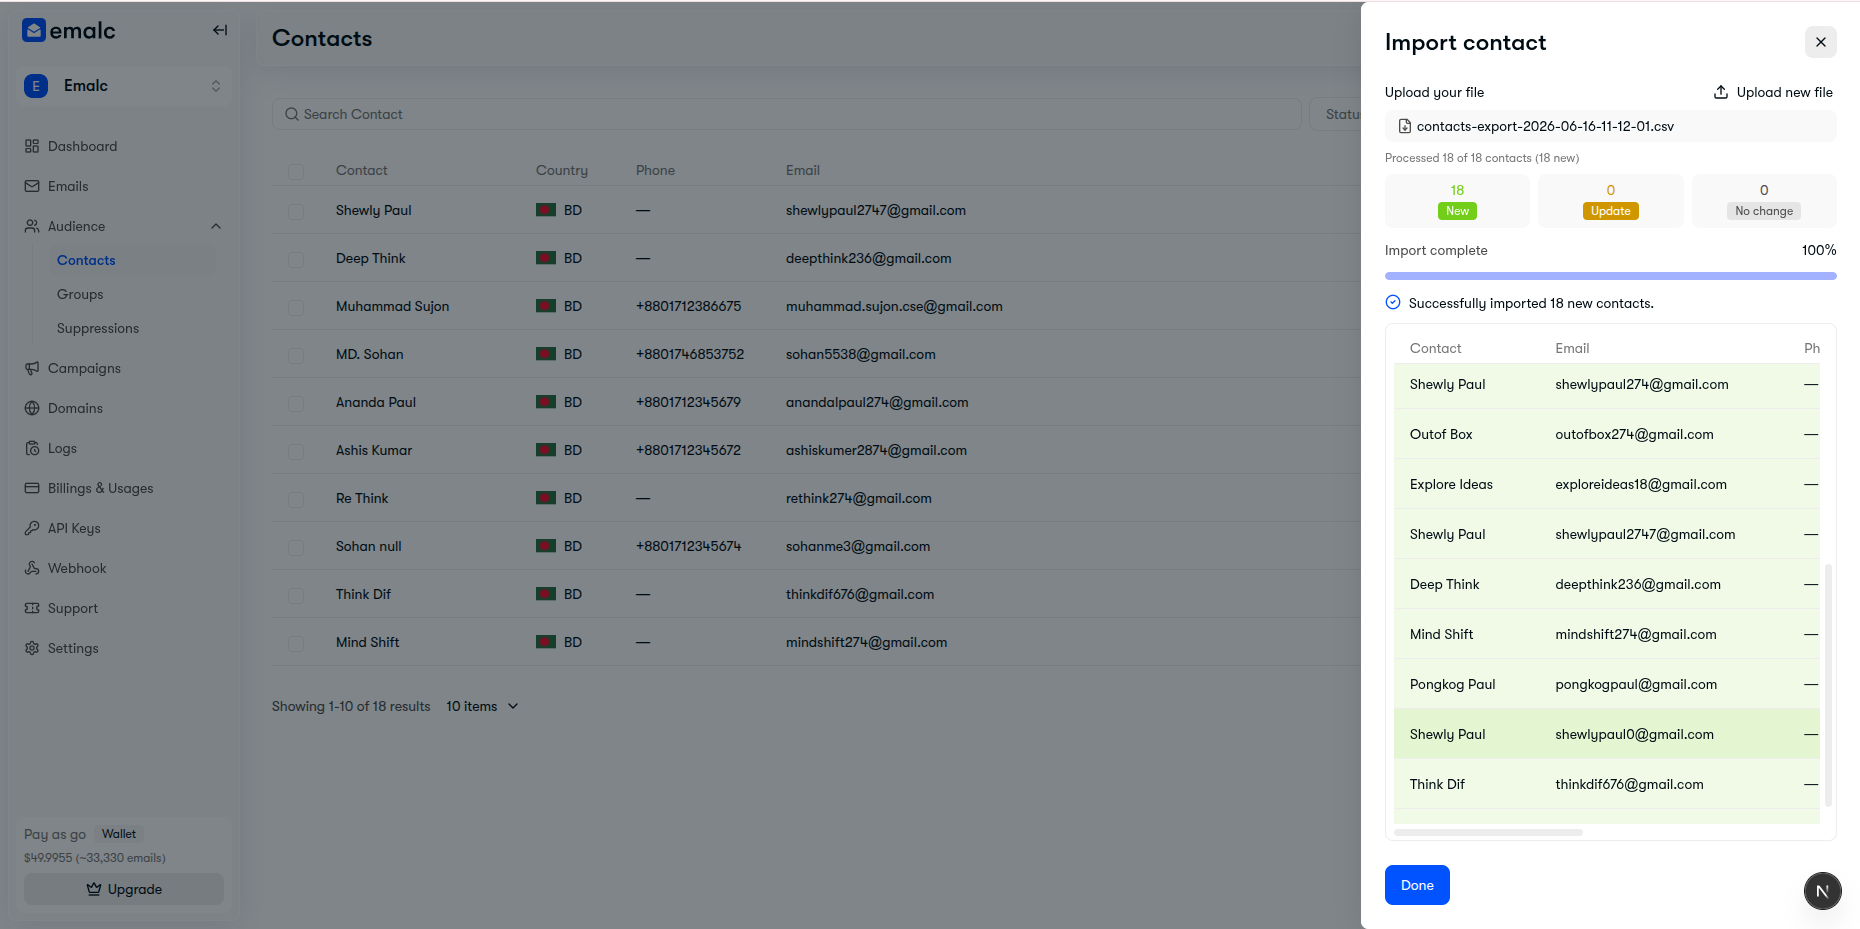 CSV import completion screen showing 100% progress and total imported count
When complete, a green success banner confirms the total number of imported contacts, and your contacts table updates immediately.
Contact Quality Inspection Rules#
Follow these 4 essential rules before uploading contact lists to maintain high sender reputation:
Verified Opt-In Consent
Only import subscribers who have explicitly opted in to receive emails from your brand. Never upload purchased, scraped, or third-party email lists.
Accurate Column Headers
Verify that your column headers match the template (e.g. emailaddress, firstName) to prevent data mapping errors during import.
Standardized Phone & Country
Format phone numbers with international dial codes (e.g. +1, +44) and use 2-letter ISO country codes for accurate geolocation.
Active Subscription Status
Ensure known unsubscribed contacts are flagged with status: unsubscribed. Emalc automatically honors their preference and excludes them from live campaigns.
Exporting Your Contacts#
You can export your full contacts directory at any time:
- Go to Audience → Contacts.
- Click the Export icon (download tray) in the top-right toolbar.
- Your browser will instantly download a complete
.csvfile containing all contacts, phone numbers, subscription statuses, and creation timestamps.